Written by Brenda F., Extension Master Gardener℠ Volunteer of Chatham County
Do you need more rosemary plants but don’t want to buy them? Maybe you have a rosemary you need to move and are concerned it will not transplant well? Rosemary plants are difficult to grow from seed but are easy to propagate from existing plants. Late spring into summer is a good time of year to do just that.
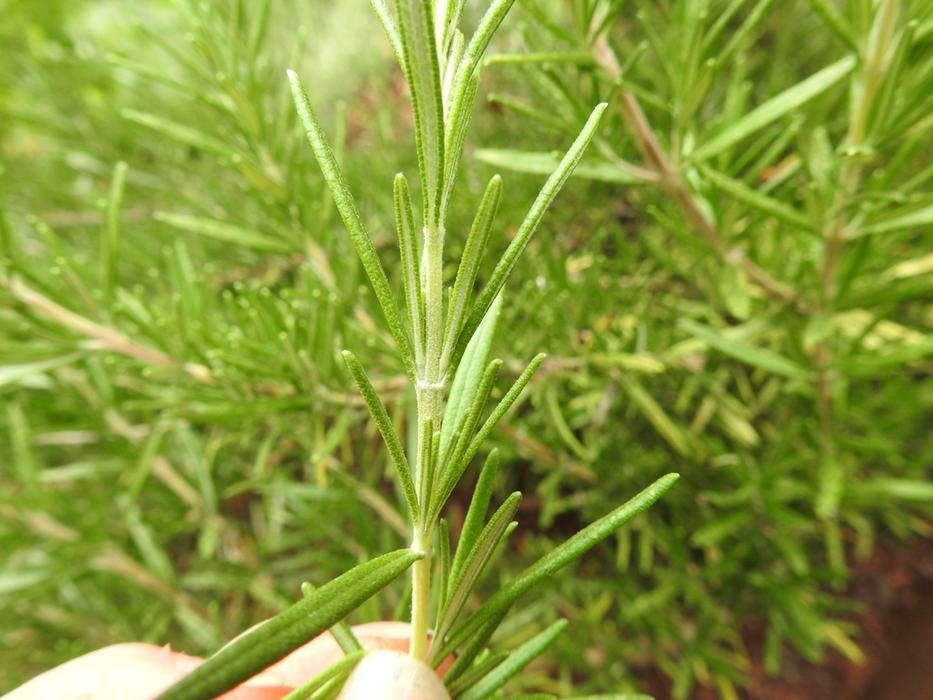
During the winter, the stems of rosemary plants are brown and woody. In the spring, they put on new growth which is green and flexible. When these green stems are long enough for you to snip 3-8 inches off, you can take cuttings to create new plants.
First, prepare the pots to start your new rosemary plant in. Choose a clean pot that drains well and is at least 3 inches deep. You can put multiple cuttings in one pot, so the bigger around the pot is, the more cuttings you can fit. Fill the pot with a soilless mix that drains well. This can be sand, perlite, seed starting mix, or potting soil mixed with one of these. You do not want to use heavy, clay soil.
Either take the pots to the plant you will be taking cuttings from or take a plastic bag to the plant to gather the cuttings that you can then quickly take to your potting area. Detaching the rosemary tip from the plant is stressful for the propagule, so the quicker you can plant the cutting, the better its chance of survival.
Find green stems that are healthy looking and straight with no flowers. Snip off the tip so that it is 3-5 inches long.
Strip the bottom leaves off the stem so that only the top 1-2 inches of the stem still has leaves. Then snip the stem right below a node, or where the leaves were attached. The nodes feel like bumps on the stem. By cutting the stem at that point, it helps stimulate the plant into growing roots from the nodes by altering the hormone signals within the plant.
Use a stick or pencil to make a hole in the soil next to the wall of your pot and place the cutting into the hole so that only the stem with leaves is above the surface. Gently push the soil around the cutting so the stem has good contact with the soil but is not compacted. You can place cuttings all the way around the pot, leaving 1-2 inches between cuttings. Water the cuttings well.
Place a clear plastic bag around the pot and close it. Placing a large baggie upside down over the pot so it comes down at least halfway over the outside of the pot and then zipping it closed is an easy way to do this. You can also use a clear bag that is big enough to be tied or closed with a twisty tie. This bag acts as a mini greenhouse, keeping the cuttings moist as they form roots.
Set your pots in a bright but sheltered location. They should not be put in full sun or exposed to lots of wind. Check the pots every few days and keep the soil moist. In 4-6 weeks, the cuttings should have roots. Once each seedling has developed a strong root system, you can transplant each cutting into its own pot. Lift each plant using a tool (a craft stick works well) to get up under the roots. Repot into a well-draining soil. Potting soil with added perlite is a good example. The plant will continue to grow roots and will be ready to transplant outside in fall.
You can expect 30-50% of your cuttings to root. Take 2-3 times more cuttings than you need and if your cuttings are very successful, you will have extra rosemary plants you can give as gifts!
If you would like more information on other methods to start new plants or other plants you can start with stem cuttings, check out these resources.
Plant Propagation by Stem Cuttings
NC Extension Gardener Handbook Chapter 13: Propagation
Written by Brenda F., Extension Master Gardener℠ Volunteer of Chatham County